Cloudflare DNS
If your domain was purchased from Alibaba Cloud, Tencent Cloud, Name.com, or another provider and DNS is still managed there, skip this guide and use Domain DNS Setup.
Continue only in either of these cases:
- You purchased the domain from Cloudflare.
- You purchased the domain elsewhere, but its DNS / nameservers are hosted by Cloudflare.
💡 In this guide, you will add the root redirect and
wwwCNAME in Cloudflare, then checkDNS/SSLin AllinCMS admin. Estimated time: 10 minutes.
Cloudflare's most common mistake is proxy status. The root domain and www need different settings. Finish the main setup first, then adjust advanced rules.
📺 Video: DNS Setup
📺 Video blank? Open it in a new tab.
Overview
1. Copy Target
In AllinCMS admin, open Domains and copy the generated CNAME target.
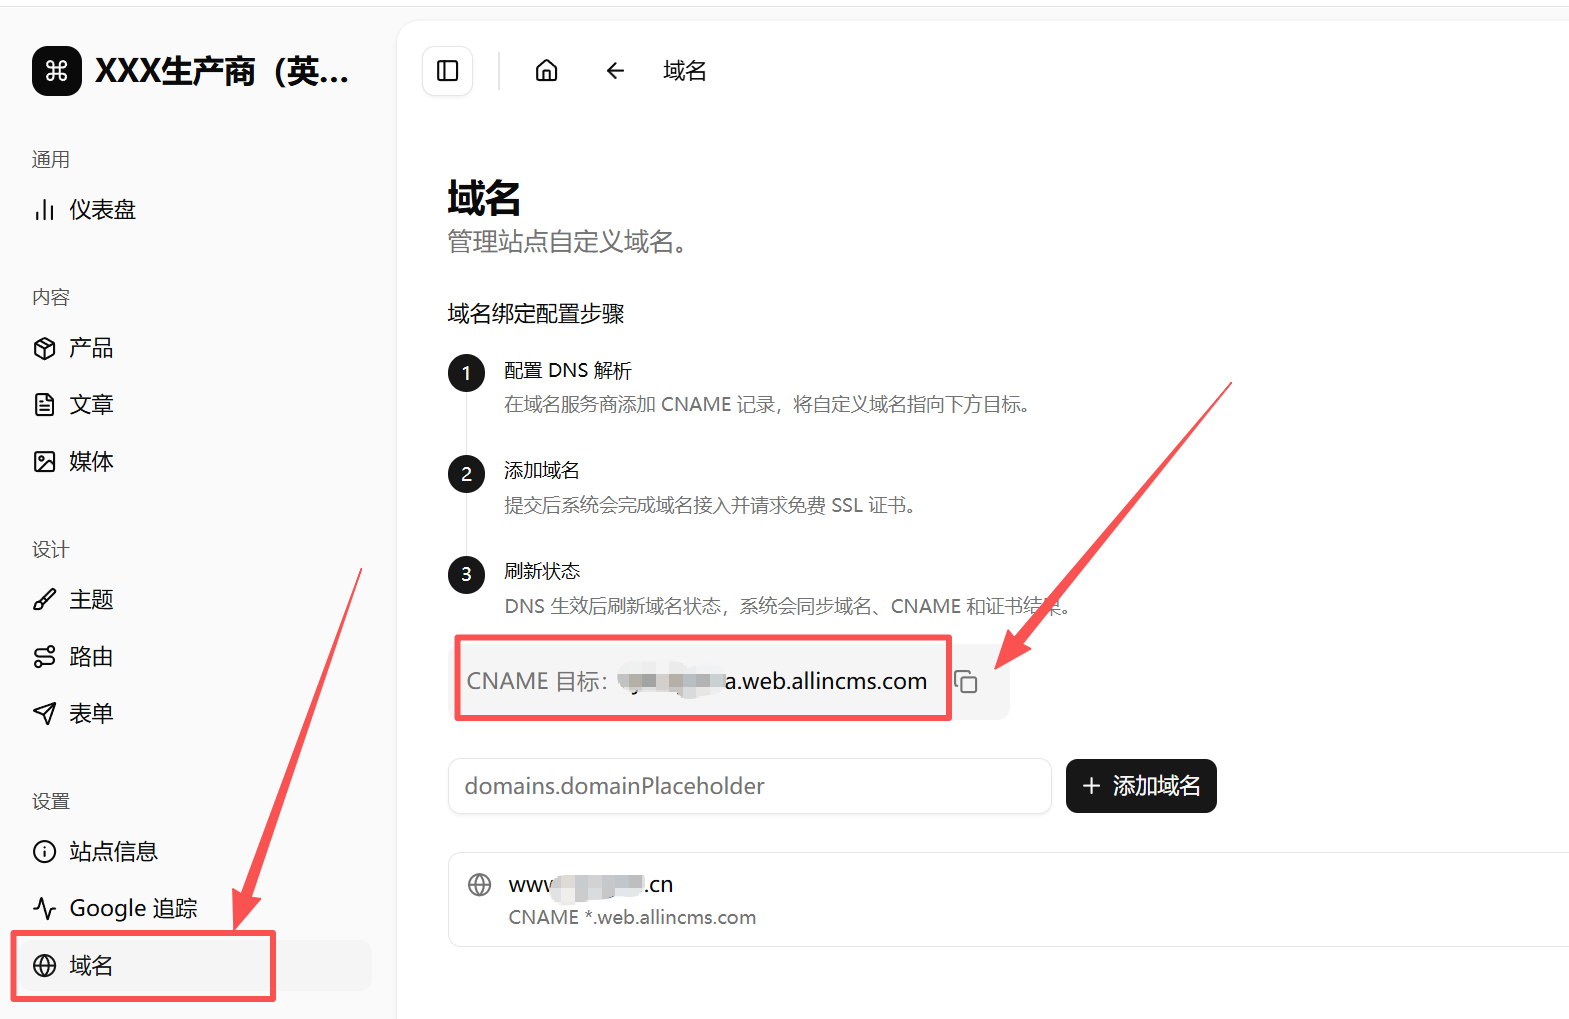
If you are not sure where the CNAME is, read the "Get Target" section in DNS Setup.
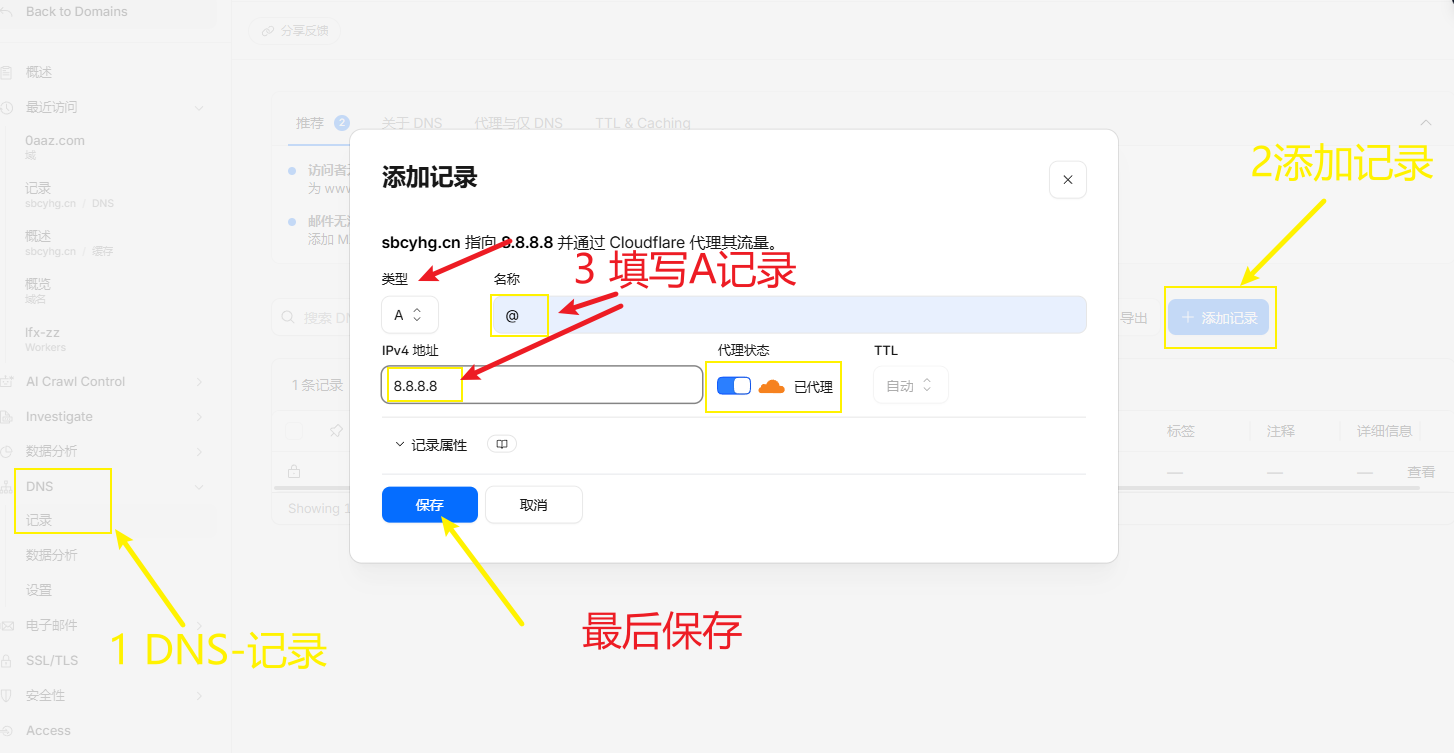
2. Root A
In Cloudflare, open your domain, go to DNS -> Records, and click Add record.
For the root domain record:
| Field | Value |
|---|---|
| Type | A |
| Name | @ |
| IPv4 address | 8.8.8.8 |
| Proxy status | Proxied |
| TTL | Auto |
This A record is mainly used to redirect the root domain to www. Do not treat it as the actual server address for the AllinCMS site.
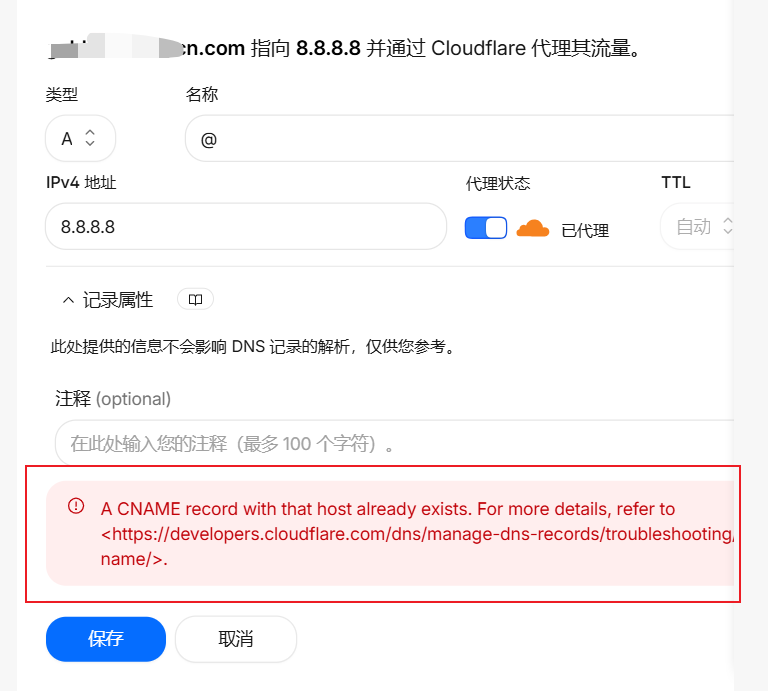
3. www CNAME
Add a CNAME record:
| Field | Value |
|---|---|
| Type | CNAME |
| Name | www |
| Target | Paste the AllinCMS admin CNAME target |
| Proxy status | Disabled, DNS only |
| TTL | Auto |
Before adding the www CNAME, check whether Cloudflare already has a record with the same name.
If you see A CNAME record with that host already exists, the www host already has a CNAME or A record.
Use one of these fixes:
- If you do not need the old record, delete the existing
wwwrecord and add the CNAME again. - If you need to keep the same host, edit the old record, change the type to
CNAME, and replace the target with the AllinCMS adminCNAME target.
Do not keep two records with the same www name.
Then fill the CNAME like this. The three key fields are: choose CNAME, enter www, and paste the AllinCMS admin CNAME target. Keep proxy disabled so it shows DNS only.

After saving, the DNS list should contain two key records: the root A record and the www CNAME record.
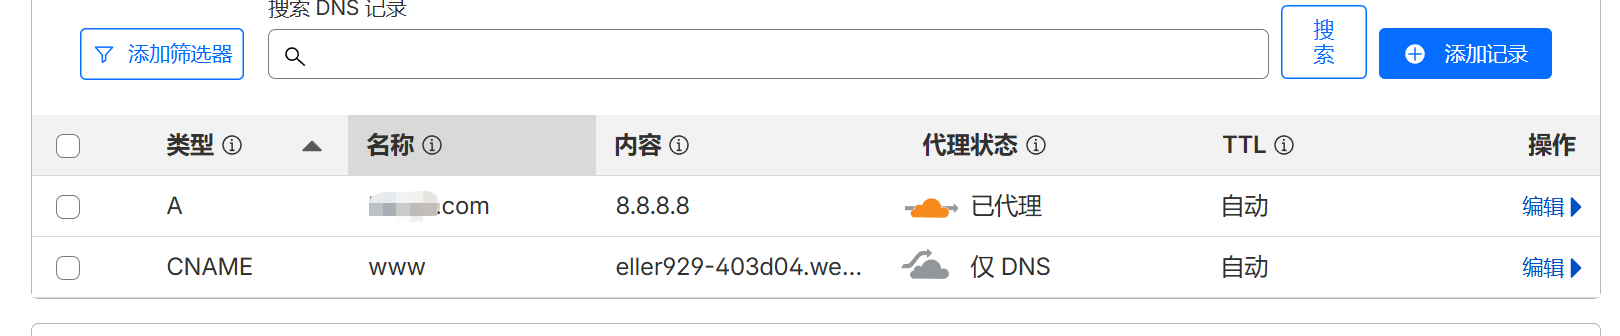
Keep the www CNAME proxy disabled first, so AllinCMS admin can verify DNS and SSL. The cloud should be gray and show DNS only.
4. Redirect www
If you want example.com to redirect to www.example.com, create a page rule or redirect rule in Cloudflare.
Example:
URL: example.com/*
Setting: Forwarding URL
Status code: 301 permanent redirect
Target: https://www.example.com/$1
Replace example.com with your real domain.


5. Refresh Admin
For Cloudflare, AllinCMS admin usually only needs the www domain added and selected as the primary domain. After DNS records are saved, return to Domains and refresh.

If SSL fails, wait 10 to 30 minutes and refresh again.
Pitfalls
| Mistake | Result | How to avoid it |
|---|---|---|
🔴 Proxy enabled on www CNAME | AllinCMS admin verification may fail | Use DNS only first |
| 🟡 Root domain not redirected | Root domain may not open | Add 301 redirect to www |
🔴 Adding https:// before CNAME target | DNS does not pass | Enter the plain domain only |
| 🟡 Judging right after saving | False failure | Wait 10 to 30 minutes |
Next
- 📚 Not Secure: read this if SSL does not pass.
- 📌 Launch Checklist: run the launch check after DNS passes.