Create a Site
Tip: In this guide, you will log in, create a site, enter the site admin, create a default theme, enable the theme, and know what to check when the frontend shows 404. Estimated time: 8 minutes.
Do not start by editing the homepage. First confirm that the site, theme, and homepage work. Otherwise, products, posts, and menus may be ready in the admin while the frontend still cannot open.
Find the page first
Path: AllinCMS Workspace dashboard → Sites → Create Site


Overview
1. Log In
Open the workspace login page:
https://workspace.laicms.com/sign-in
Enter your email and password, then click Log In. After login, you enter the workspace dashboard. The left sidebar contains entries such as Dashboard, Sites, and Users.
To create a website, click Sites first.
2. Create Site
On the Sites page, click Create Site on the right side.
In the create-site dialog, fill in:
| Field | What to enter |
|---|---|
| Name | Company name, brand name, or website name |
| Description | One or two sentences about the website or business |
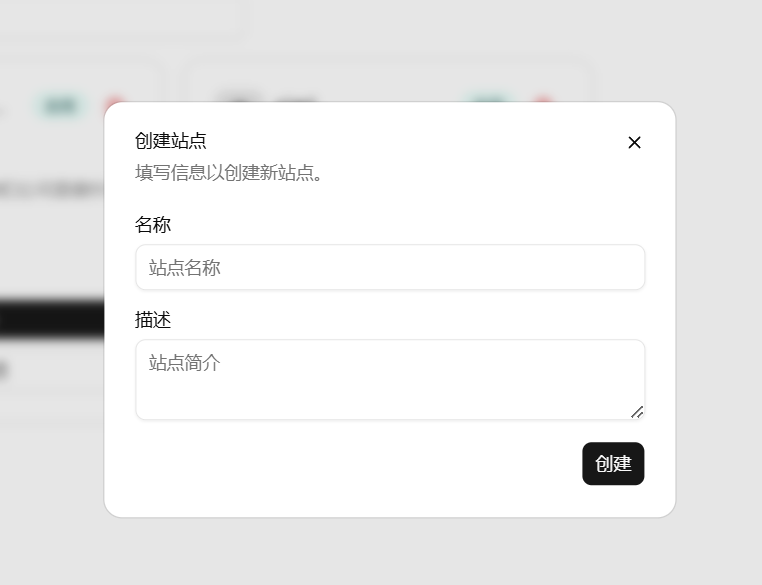
Click Create. After the site is created, it appears in the site list and shows a system-assigned AllinCMS temporary domain.
3. Click Open Site First
After creating the site, do not start editing immediately. Return to the Sites list and check the two buttons on the site card:
Enter Admin: enter this site's admin to manage products, posts, themes, and domains.Open Site: open the frontend website and check what visitors see.
In this step, click Open Site first to check whether the frontend opens normally. If it shows 404 or a blank page, return here and click Enter Admin to troubleshoot.

Check what opens. Do not skip this:
| What you see | Meaning | Next step |
|---|---|---|
| Normal template page | Theme and template content were imported successfully | Enter admin and start editing |
| 404 or blank page | Template was not imported, theme is not enabled, or no homepage is selected | Click Enter Admin and troubleshoot |
Click Open Site once. If a normal template page opens, the theme was imported successfully. Enter the admin and start editing instead of creating another theme.
Continue with the troubleshooting steps below only when the frontend opens as 404 or a blank page.
4. Enter Admin to Troubleshoot
If the site opens as 404, click Enter Admin on the site card to enter this site's admin.
The current left sidebar has 4 groups:
| Group | Menu | Purpose |
|---|---|---|
| General | Dashboard | View published pages, content, and forms |
| Content | Products, Posts, Media | Manage products, posts, and files |
| Design | Themes, Routes, Forms | Manage website pages, paths, and forms |
| Settings | Site Info, Google Tracking, Domains | Manage basic info, tracking, and domains |
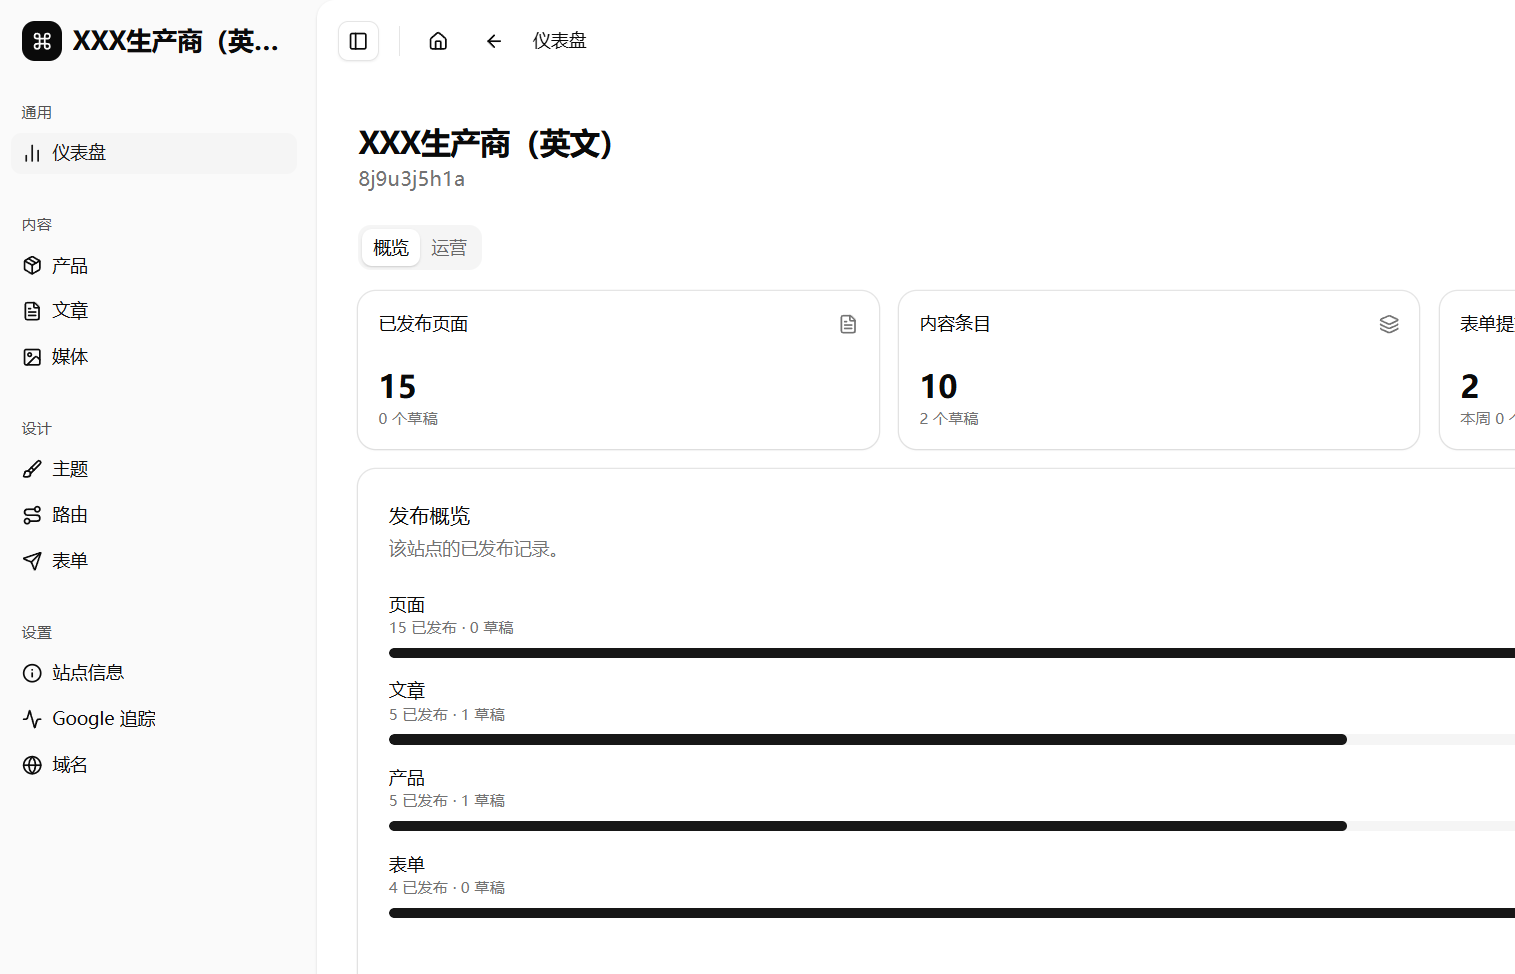
A new site may have no theme yet, and page, post, and product counts may be 0. This is not necessarily an error. First decide whether you need to create a theme.
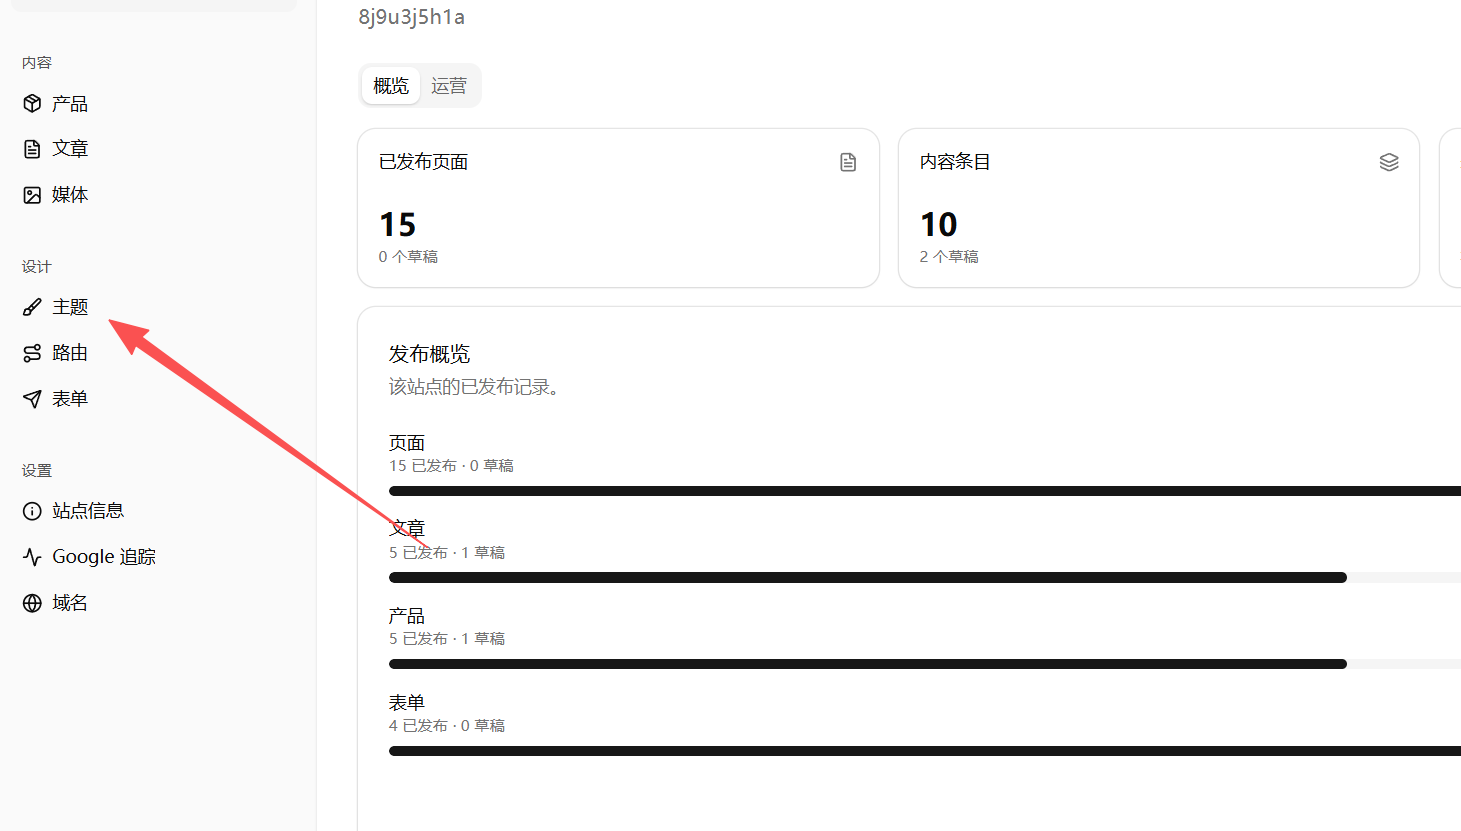
5. Create Default Theme
In the site admin, click Themes under the Design group.
After opening Themes, check what you see. Do not skip this:
| What you see | What to do |
|---|---|
| A theme already exists and the theme card shows page count | Skip theme creation. Click Pages or Design and start editing |
| A theme exists but page count is 0 or the page list is empty | Continue below. Creating a Default theme is recommended |
| It says no theme exists | Continue below and create a Default theme |
If the system has already generated a theme and pages, skip the "Create Theme" steps and start editing. Continue only when the theme is empty, pages are empty, or the frontend shows 404.
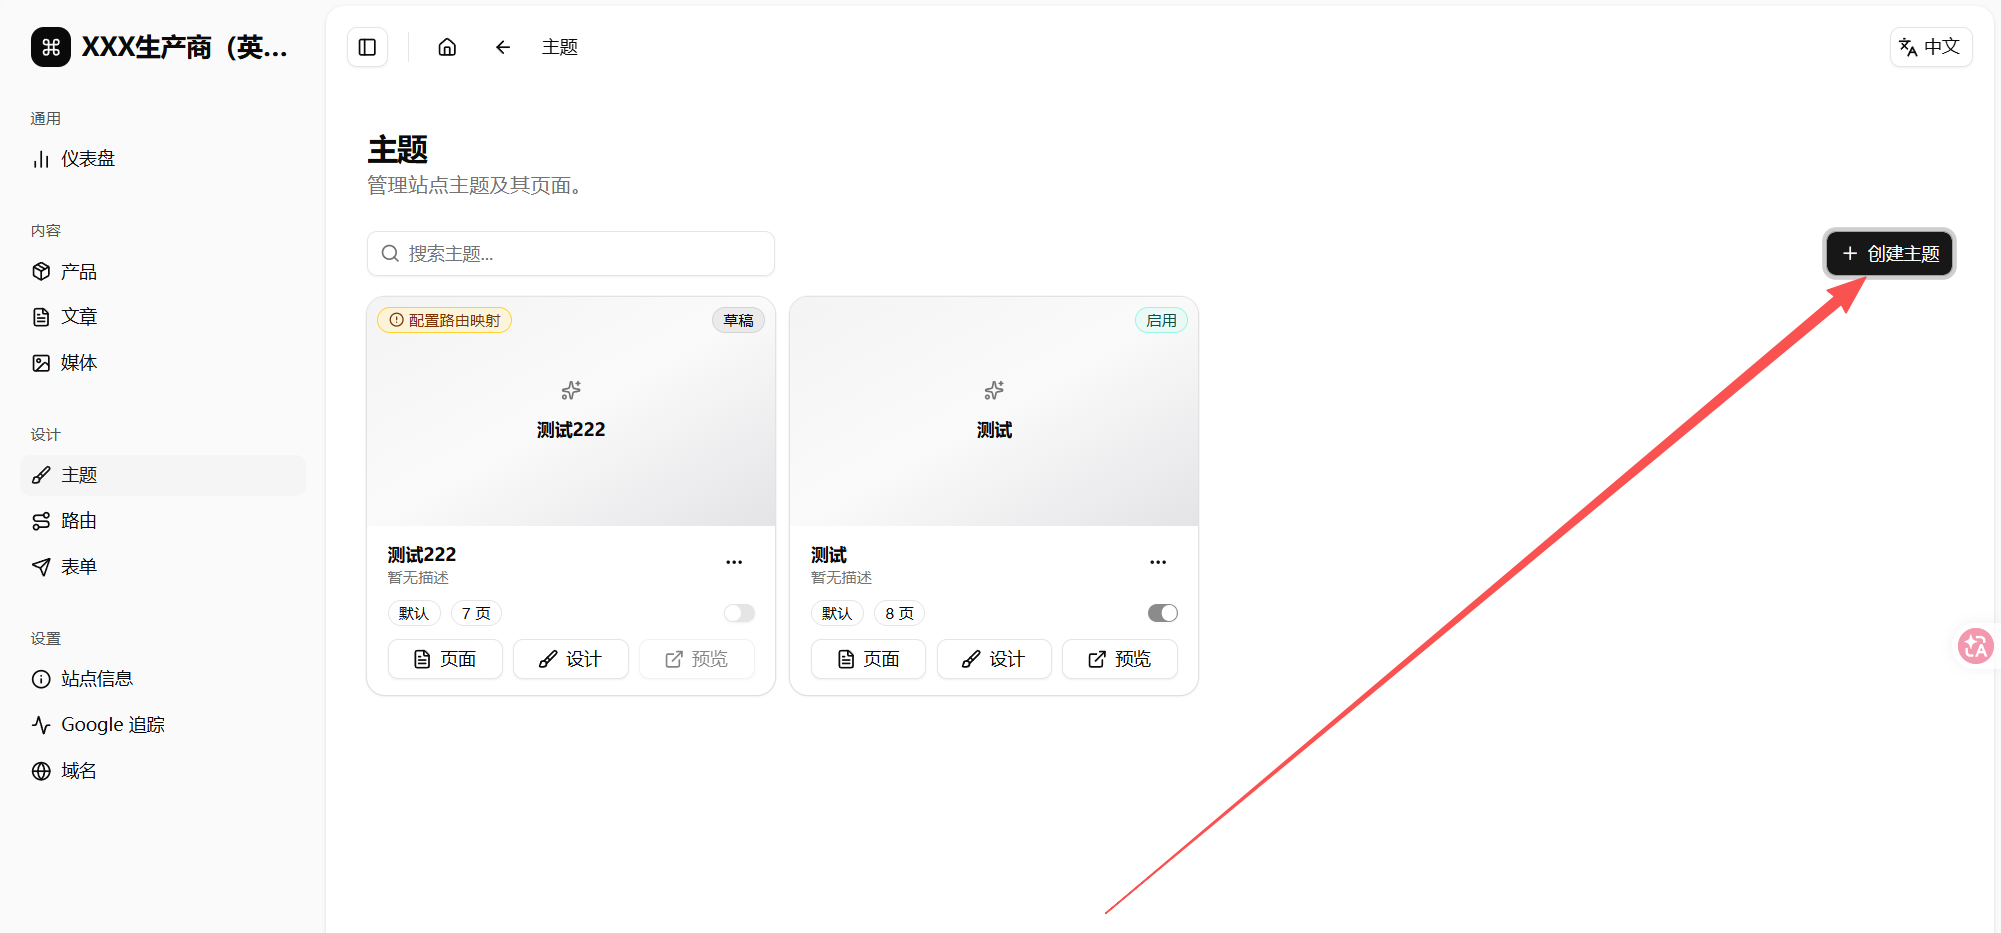
If the theme list is empty, click Create Theme.
In the create-theme dialog, focus on Preset:
- Enter a name such as
Business StyleorDefault Theme. Presetmay default toBlank.- Beginners should change
PresettoDefault. - Click
Create Theme.

Difference between Blank and Default:
| Preset | What happens | Best for |
|---|---|---|
| Blank | Creates an empty theme. Pages and content must be built from scratch | Experienced users |
| Default | Generates base pages, sample products, sample posts, and a form | Beginners |
After creation, return to the theme list. You should see a theme card with a page count.
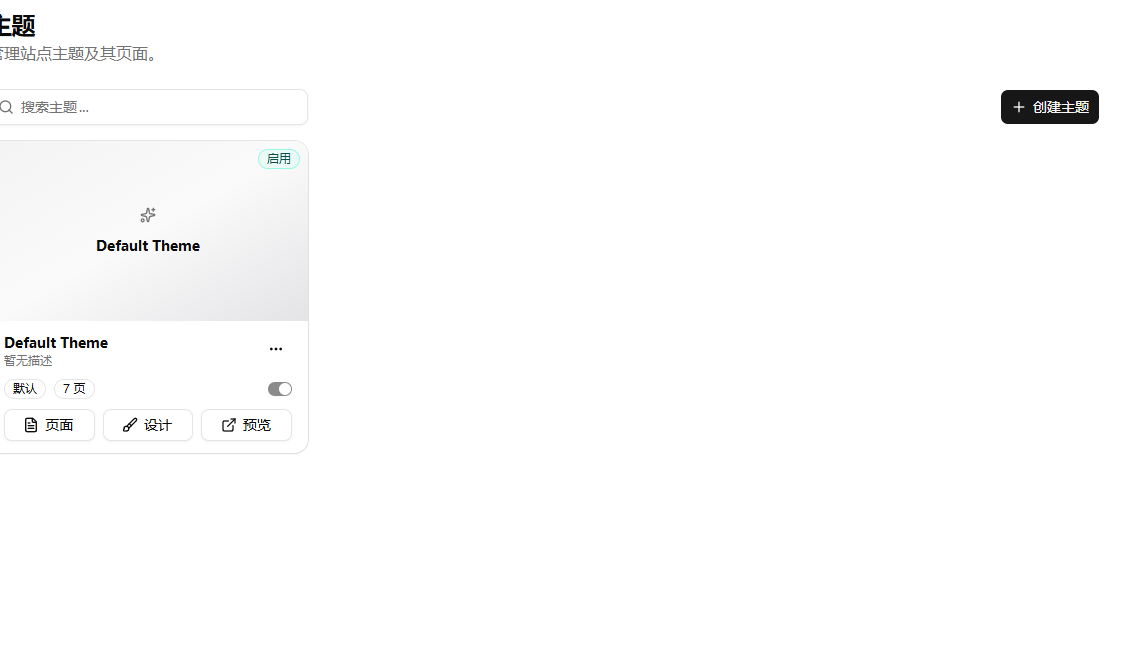
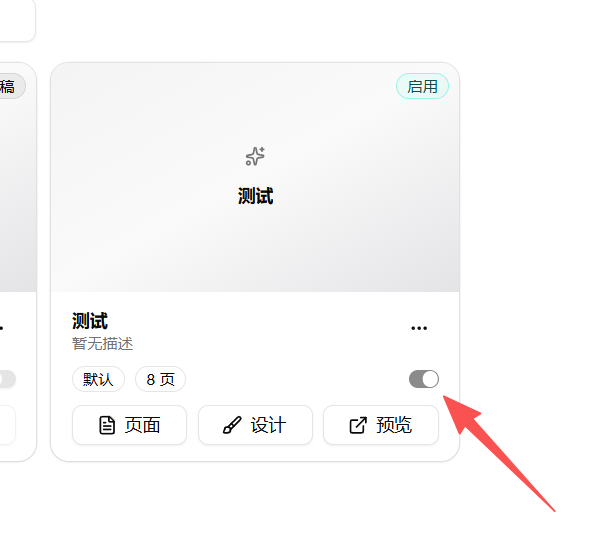
6. Enable Theme
After creating the theme, enable it. On the theme card, turn on the enable switch in the lower-right area.
How to read the status:
| Status | Meaning |
|---|---|
Draft | The theme is not the active frontend theme yet |
Enabled | The theme is used by the frontend |
If the theme is not enabled, the frontend may still show 404.
7. Check Home Page
Open the theme's Pages, then find Home.
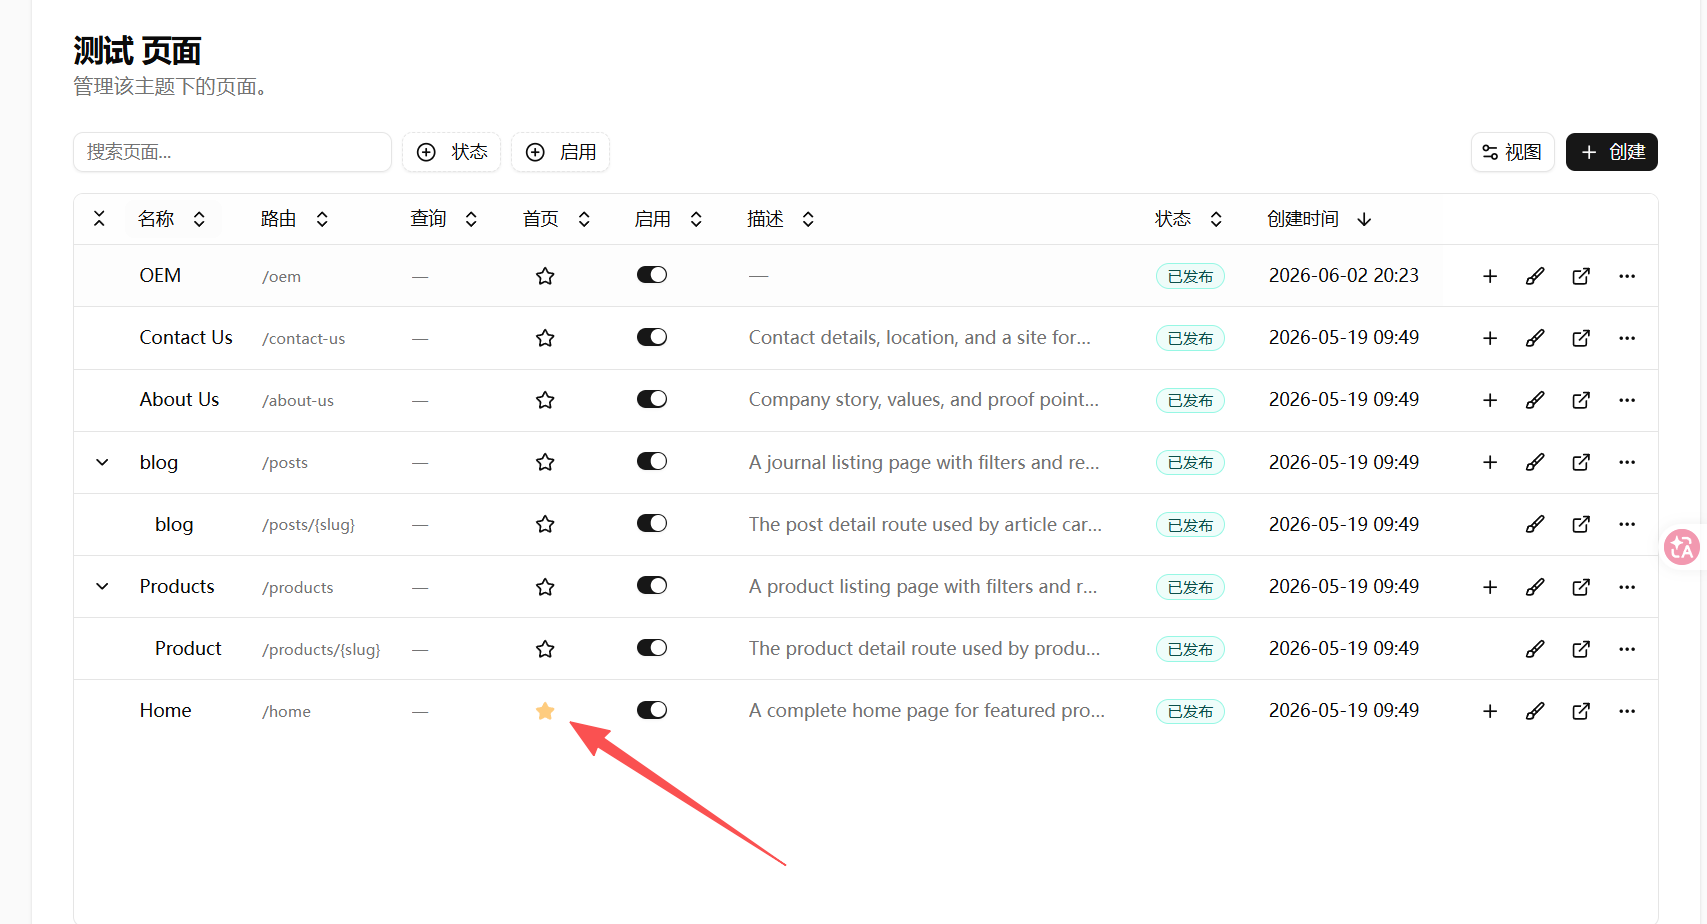
Check 3 things:
Homeis published.- The star on the
Homerow is highlighted, which marks it as the homepage. Homehas a route, such as/home.
Only a highlighted star means Home is set as the homepage. A gray or outlined star means it is not selected; click the star to highlight it.
8. Open the Site Again
After checking the theme, return to the Sites list and click Open Site again. You can also open the system subdomain with the homepage path first:
https://xxxx.web.allincms.com/home
Check the result. First decide whether it works or fails:
| Result | Meaning | Next step |
|---|---|---|
| Template homepage opens | Theme, page, and sample content are generated | Continue the site-building flow |
/home opens but root / shows 404 | Homepage route still needs checking | Use /home for theme verification first; check routes before launch |
/home also shows 404 | Theme is not enabled, or page/route is not active | Check Themes and Pages again |
| Theme list is empty | No theme has been created | Create a theme and choose Default preset |
For beginners, first confirm that the template homepage opens. Then continue with product categories, products, posts, and homepage modules. Root path and custom domain issues can be checked before launch.
If it still shows 404, check in this order:
- Whether a theme exists under
Themes. - Whether the theme was created with
Default, notBlank. - Whether the theme card shows
Enabled. - Whether
Homeexists underPagesand is published. - Whether
Homeis selected as the homepage.
Pitfalls
| Mistake | Result | How to avoid it |
|---|---|---|
| Site list is empty on first entry | You do not know the next step | Click Create Site |
| Name and description are random | Hard to identify later | Use company name and business summary |
| Assuming every new site has a theme | Admin may show 0 pages, posts, and products | Create a default theme under Themes |
Leaving preset as Blank | No starter pages or content | Beginners should choose Default |
| Theme created but not enabled | Frontend may still show 404 | Turn on the enable switch |
| No homepage selected | Site cannot find the homepage | Check whether Home is the homepage |
| Only checking admin | You do not know whether visitors can open the site | Open the system subdomain once |
/home opens but / shows 404 | Root path still needs setup | Check homepage route and domain before launch |
Next
📌 Getting Started - after the site and default theme are confirmed, prepare products, posts, and homepage modules in the recommended order.