Add Posts
Tip: In this guide, you will prepare 3 posts so the post list and homepage post module are not empty. Estimated time: 10 minutes.
Posts do not have to be only company news. They can be company updates, product knowledge, customer cases, or guides. For the first round, 3 posts are enough to make the site complete and test post list/detail pages.
If the default template already created posts, do not create new ones immediately. Edit the template posts into your own content first.
The first round only needs 3 basic posts. Once you have them, stop and edit the homepage.
If you see Untitled Post, test post, or similar content, edit it into a real post or delete it. Do not let empty posts show on the frontend.
Find the page first
Path: AllinCMS Workspace site list → Target site → Enter Admin → Posts → List


Start With 3 Posts
Recommended first posts:
| Type | Example title | Purpose |
|---|---|---|
| Company intro | About Our Manufacturing Process | Help visitors understand the company |
| Product knowledge | How to Choose the Right Product | Show expertise |
| Case or application | A Customer Case in Outdoor Use | Show real use scenarios |
1. Check Existing Posts
In the site admin, open Posts.
Check the list first:
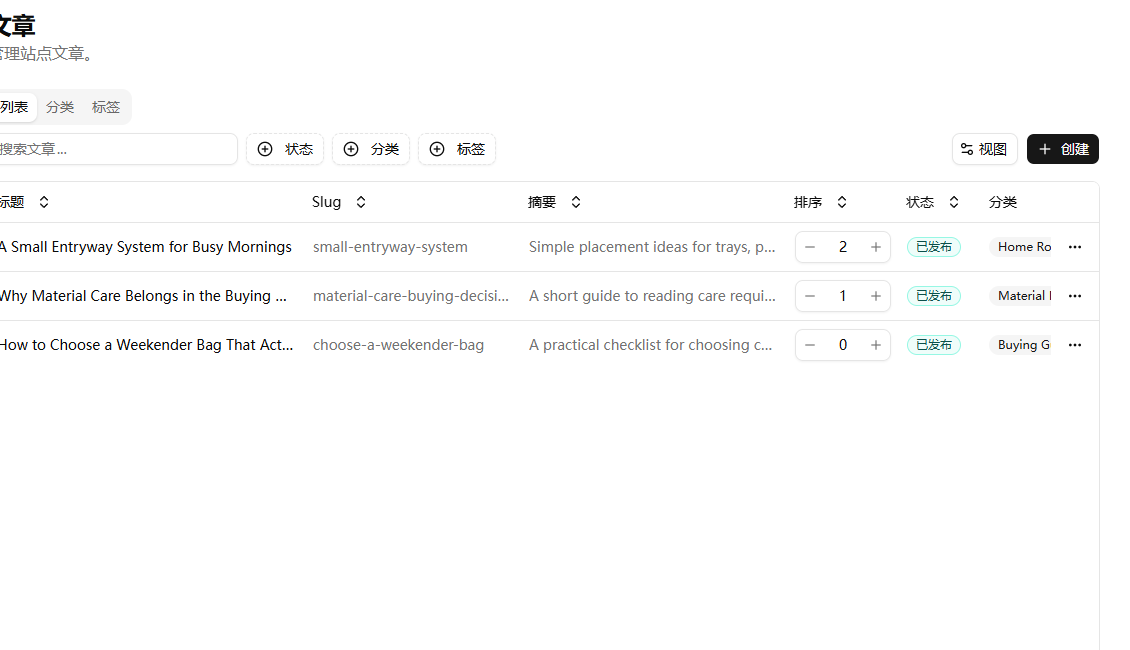
| What you see | What to do |
|---|---|
| 3 posts already exist | Edit titles, body, and cover images |
| Only 1 to 2 posts exist | Add until there are 3 |
| No posts exist | Create 3 posts |
| Empty or test posts exist | Edit them into real posts or delete them |
2. Create or Edit Post
Fill these fields first:
| Content | How to write it |
|---|---|
| Title | Use a title customers can understand |
| Slug | Use English, such as how-to-choose-right-product |
| Summary | Summarize the post in one or two sentences |
| Body | Write 3 to 5 short sections first |
| Cover image | Upload one relevant image |
| Status | Confirm it is published or enabled |
You can paste Markdown into the body. If you already wrote the article elsewhere, paste Markdown content into the body editor, then check headings, paragraphs, lists, and images.
3. Do Not Leave Posts Empty
Beginners can use this structure:
Paragraph 1: What this post is about.
Paragraph 2: Why customers should care.
Paragraph 3: How the product or service helps.
Paragraph 4: Which scenarios it fits.
Paragraph 5: Guide visitors to contact you or view products.
It does not need to be complicated, but do not publish only a title and one image.
To make posts easier for Google to understand, improve them with the Article Structure for Google Indexing template.
4. Images and Videos
For the first round, each post should at least have a cover image. If the body needs images or video, add them from the editor toolbar, or publish the complete text first and add media later.
Before uploading cover or body images, read Image Guidelines. Properly sized and compressed images are less likely to look blurry or slow down the page.
Recommended order:
- Finish title, summary, and body.
- Upload the cover image.
- Add body images or video later.
Do not block the first round waiting for video. Publish text and cover images first. Videos, more images, and case details can be added later.
5. Check Frontend
After publishing, check:
/postsor the post list page opens.- Post titles display.
- Clicking a post opens the detail page.
- Cover images are not blurry or badly cropped.
- The homepage recommended post module shows posts.
If post detail pages show 404, the post module usually has the wrong detail page setting. It is commonly /posts.
First Post Batch Standard
You can move on when:
- There are at least 3 posts.
- Each post has a title, summary, body, and cover image.
- Posts appear in the frontend list.
- Post detail pages open.
- No
Untitled Post,test, or test post appears on the frontend.
Next
Homepage Basics - after products and posts exist, start editing the homepage.