Add Products
Tip: In this guide, you will prepare 2 products for each main category, so product pages and homepage modules have content to show. Estimated time: 10 minutes.
Do not upload dozens of products at the beginning. First make sure each main category has 2 representative products. That is enough to test category pages, featured products, product detail pages, and homepage modules.
If the default template already created products, do not create new ones immediately. Edit the template products into your real products first.
First-round target: at least 2 products per main category. Once that is done, stop and move to posts and homepage setup.
If you see Untitled Product, test product, or similar content, edit it into a real product or delete it. Do not let test content show on the frontend.
Find the page first
Path: AllinCMS Workspace site list → Target site → Enter Admin → Products → List


Overview
1. Confirm Categories
Complete Product Categories first. For the first round, keep only 3 to 4 main categories.
Example:
Wireless Earphones
Bluetooth Speakers
Smart Watches
Accessories
Prepare 2 products for each category. If you have 3 to 4 categories, that means 6 to 8 products.
2. Check Existing Products
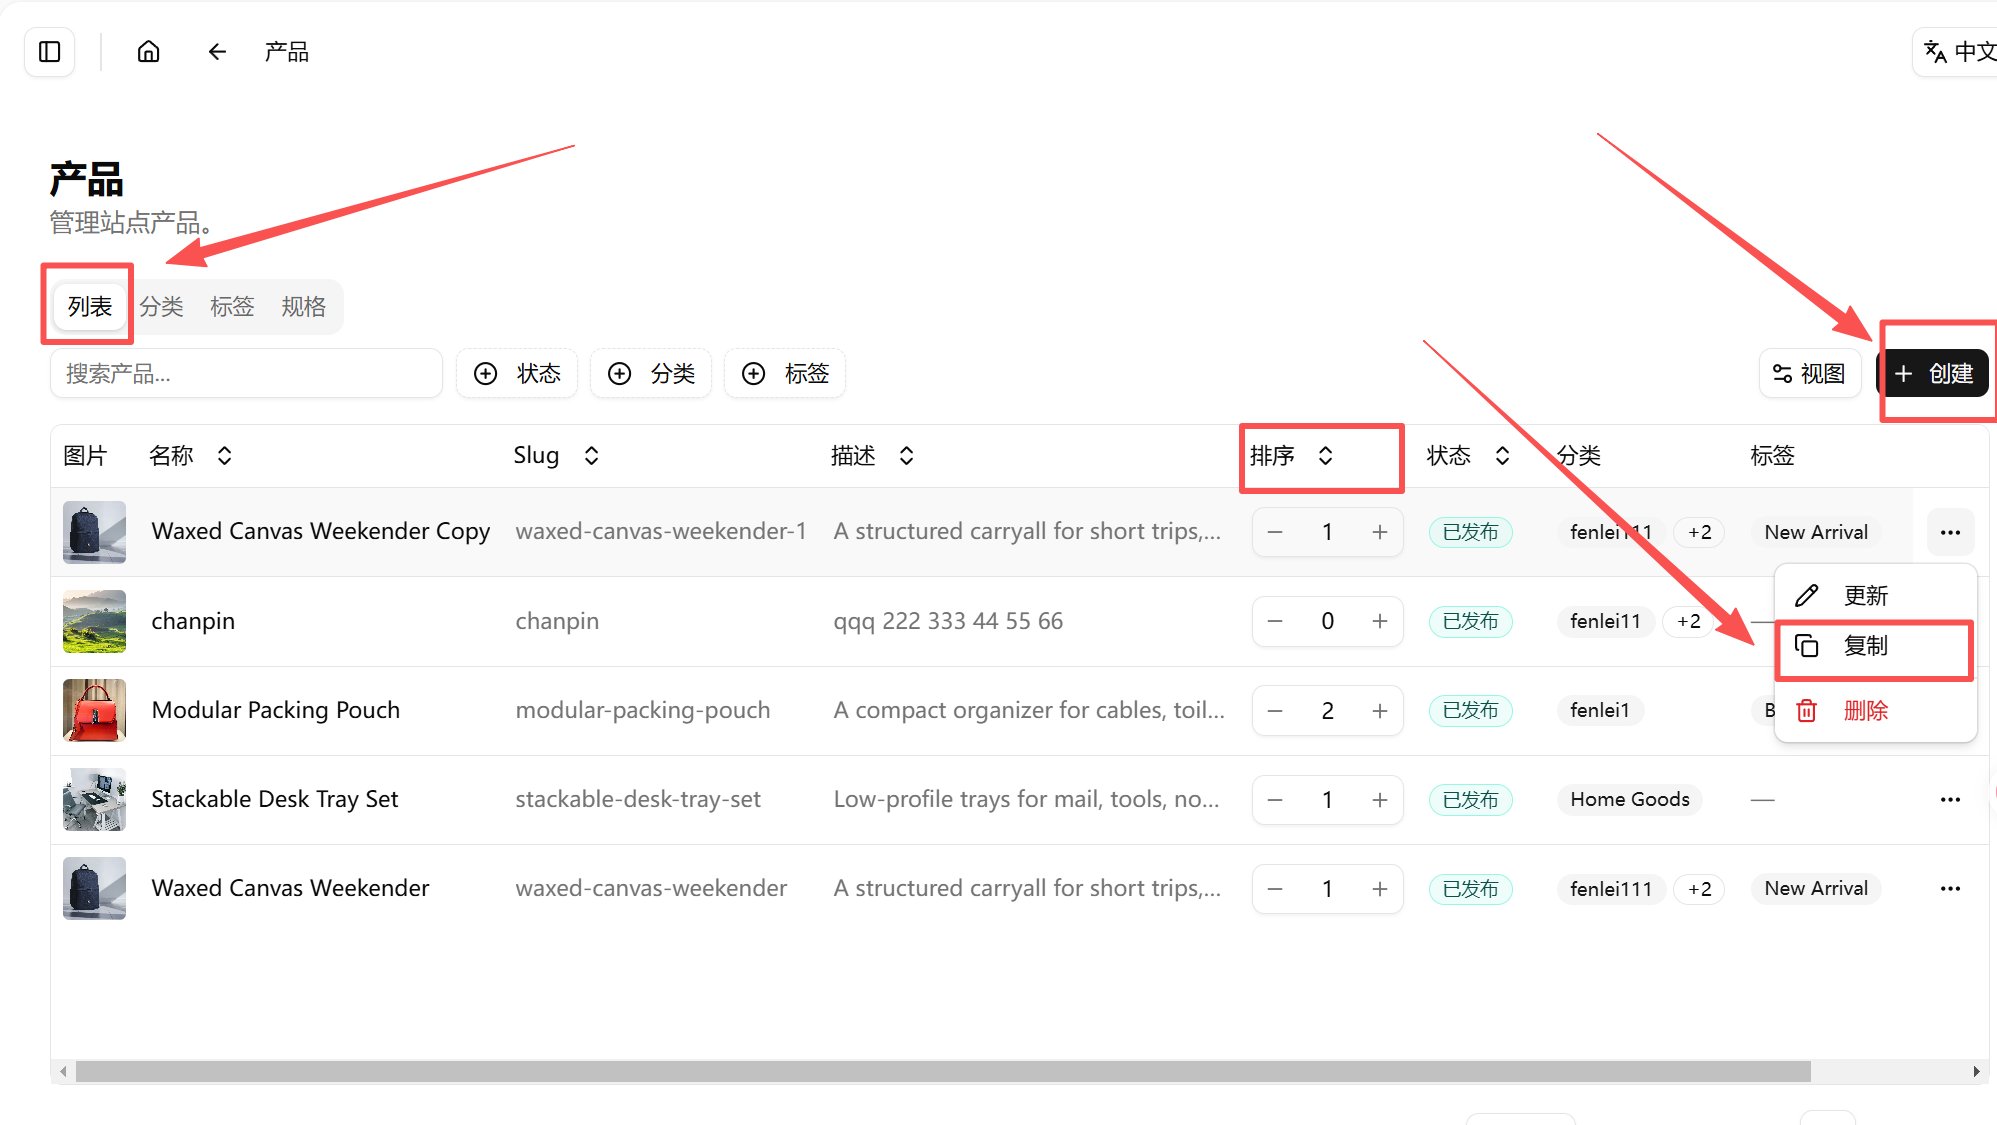
In the site admin, open Products.
Check by category:
| What you see | What to do |
|---|---|
| A category already has 2 usable products | Edit images, name, and description. Do not add more |
| A category has only 1 product | Add 1 more |
| A category has no products | Add 2 products |
| Template products exist but categories are wrong | Edit the product category |
Remember this: Do not delete template products just because they exist. Edit what can be edited, and add only what is missing.
3. Create or Edit Product
Fill these fields first:
| Content | How to write it |
|---|---|
| Product name | Use a name customers understand. Avoid test 1 or test 2 |
| Slug | Use an English product name, such as wireless-earbuds-pro |
| Short description | One sentence about the key selling point |
| Category | Select the organized product category |
| Product images | Upload 1 to 3 clear images first |
| Status | Confirm it is published or enabled |
If you are replacing a template product, update the same fields.
4. Editor, Slug, and Sort
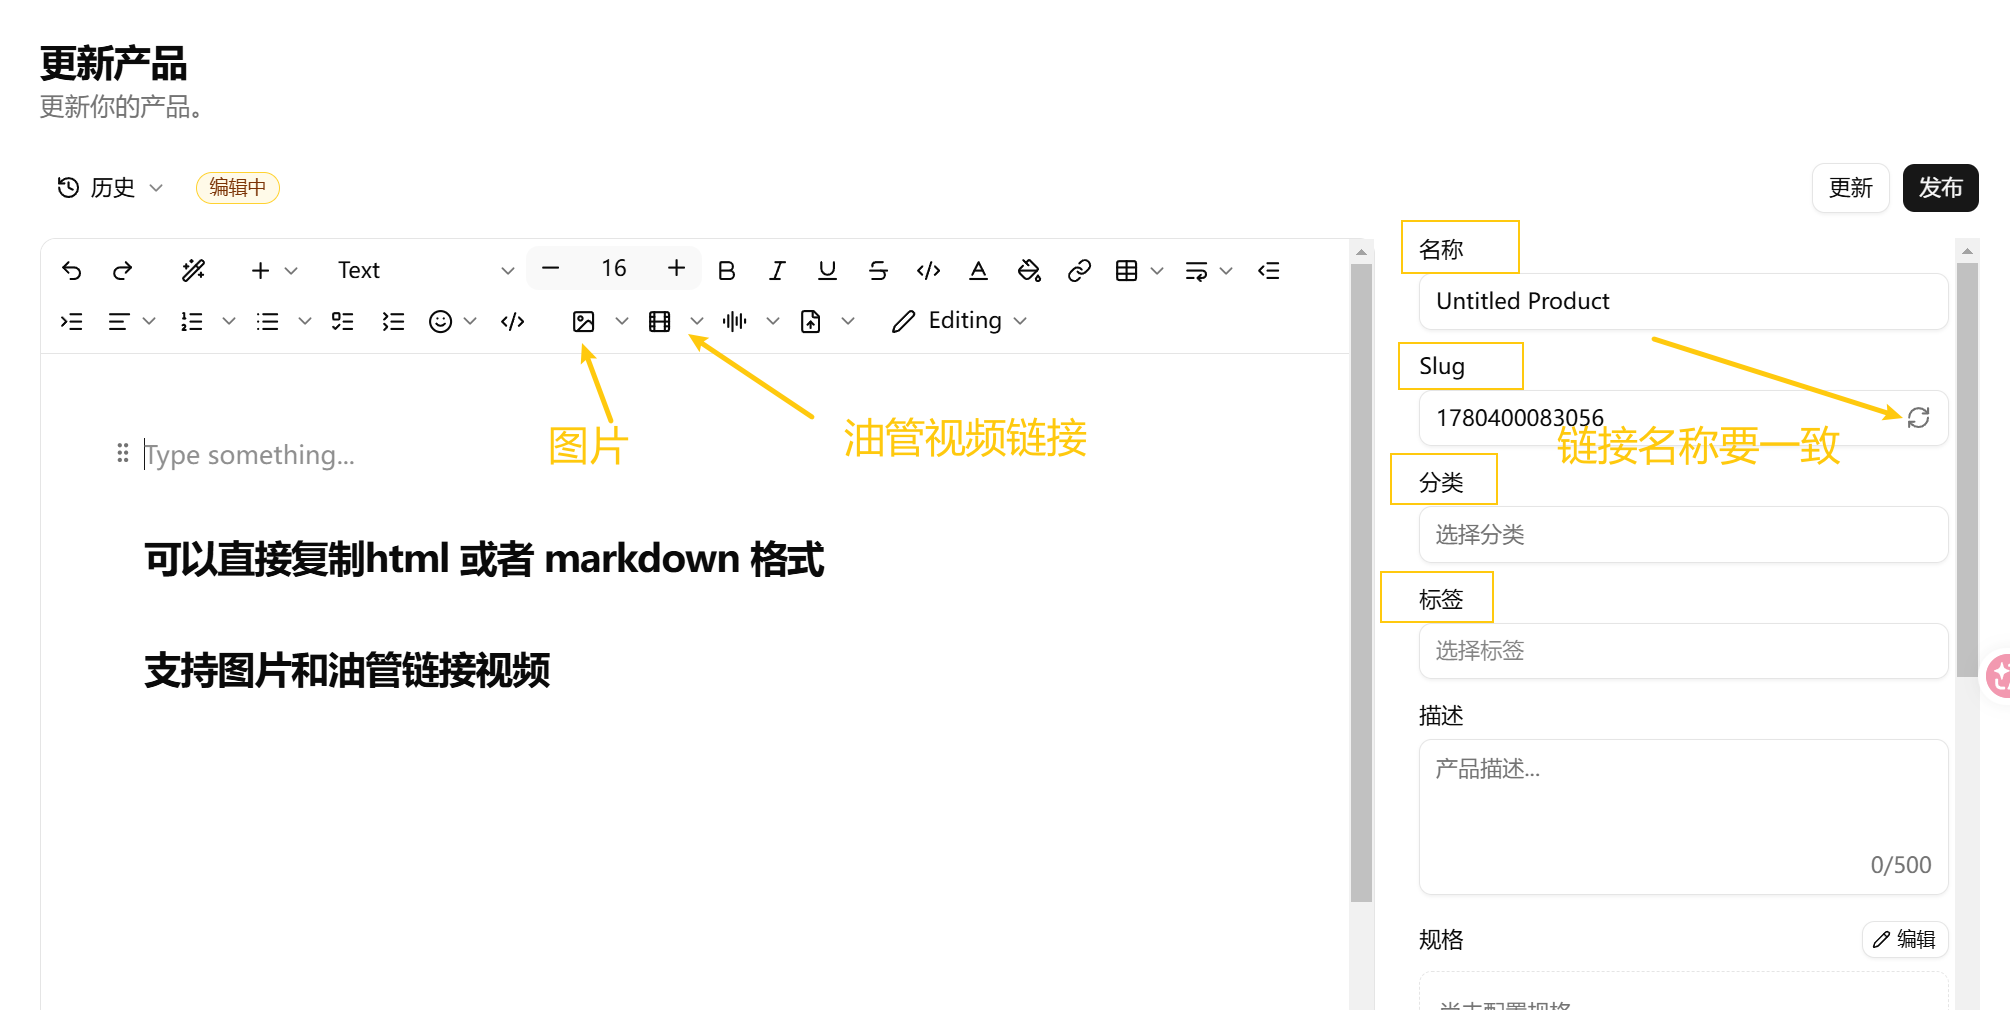
After opening the product editor, check the right-side fields and the body editor first.
Refresh Slug
After entering the product name, click the refresh button beside Slug so the link matches the product title.
Example:
Product name: Waxed Canvas Weekender
Slug: waxed-canvas-weekender
If the slug is still a random number, visitors and search engines cannot understand it. After entering the product name, click the refresh button.
Description Editor
The product body editor supports pasted HTML or Markdown content. It also supports inserting images and YouTube video links.
For the first round, write:
- Who the product is for.
- Main selling points.
- Use scenarios.
- Basic parameters or notes.
Sort
You can set the sort number in the product list or product editor. The larger the number, the higher it ranks when the frontend uses manual sorting.
This is usually used for homepage manual display order. If you want a key product to appear earlier in featured products, increase its sort number.
Sort only key products. Do not set every product very high. Increase sorting only for products you want to highlight on the homepage.
5. Main Image and Product Gallery
The first batch does not need many images, but it should look tidy.
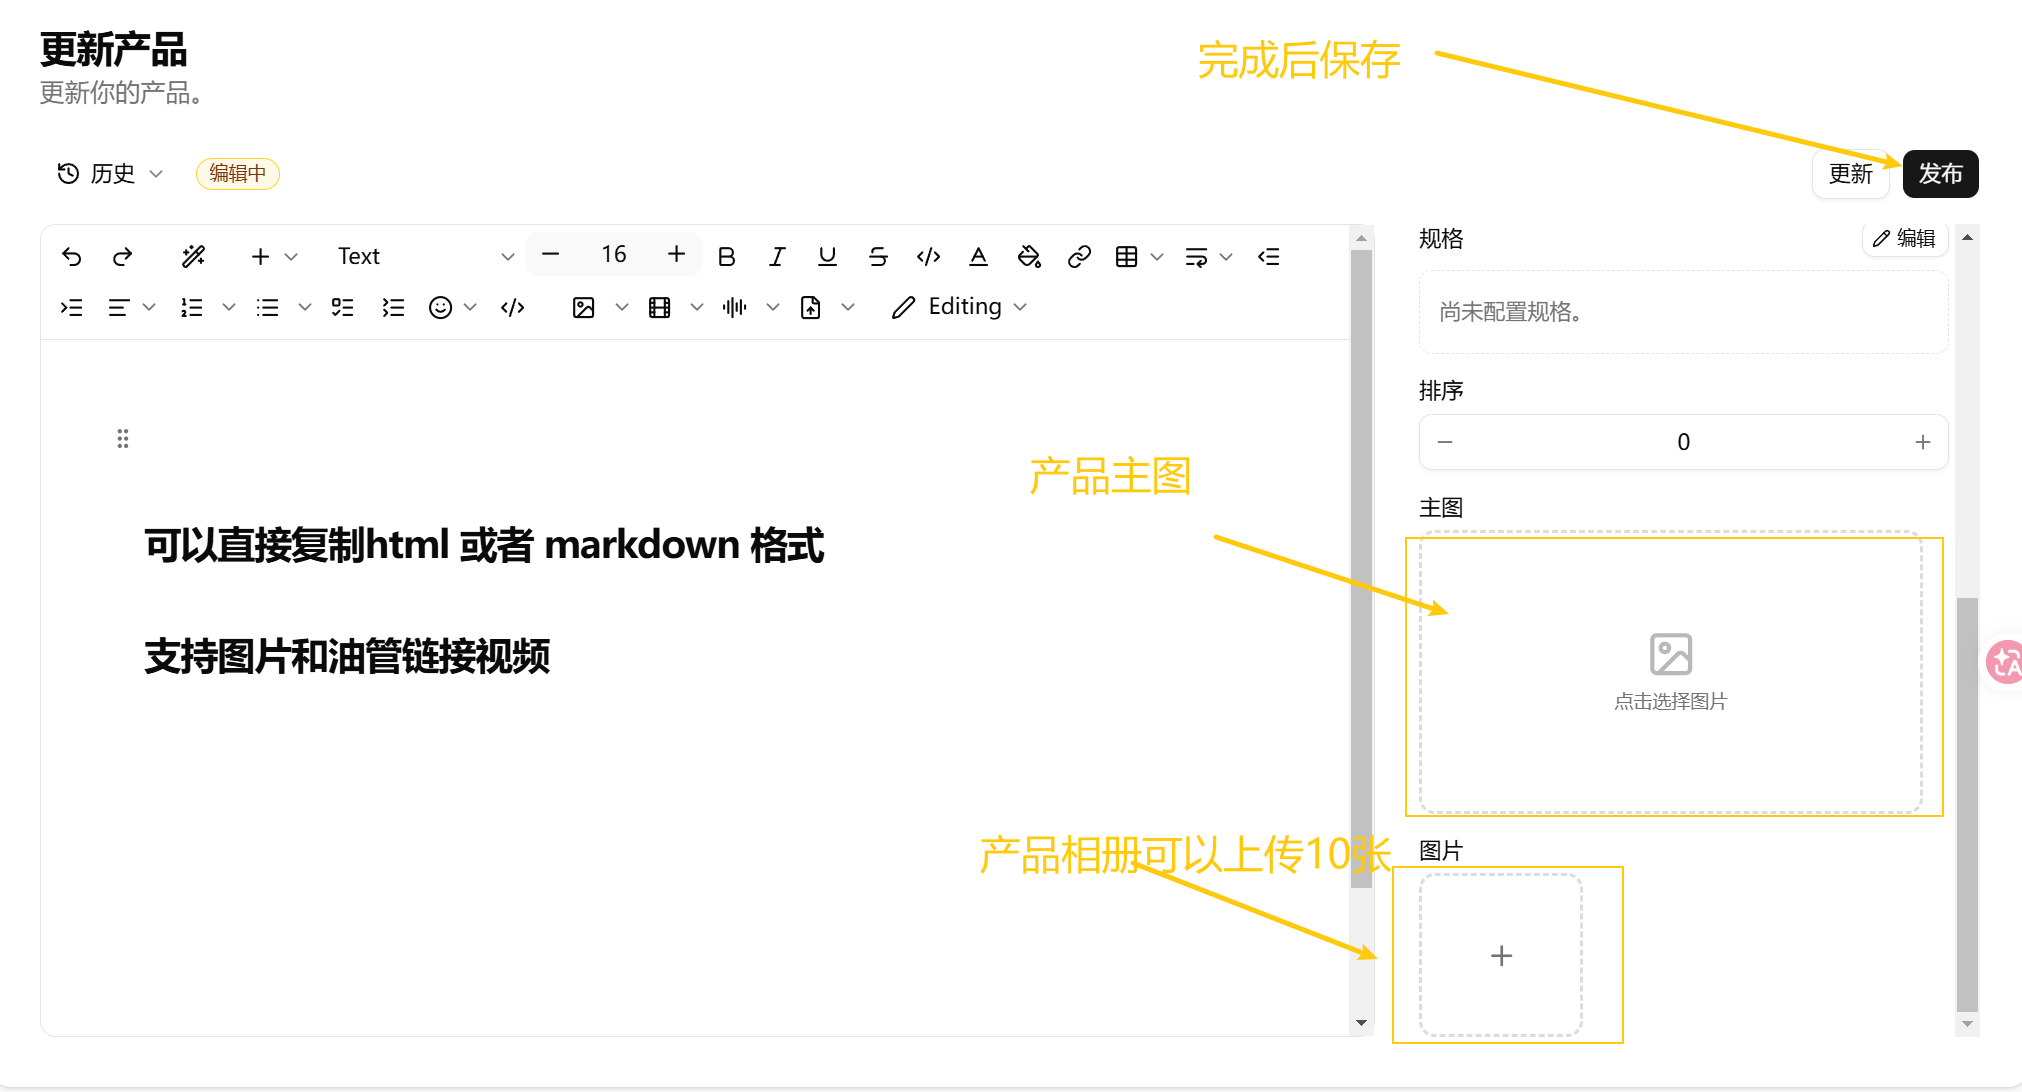
Check image size before uploading. Before uploading the main image or gallery images, read Image Guidelines. Use a square main image when possible, compress images, then upload.
Recommended:
- Upload one square image as the main image.
- Add several gallery images if needed. Start with 3 to 10 clear images.
- Compress images before uploading.
- Avoid blurry images or heavy watermarks.
- Keep image style consistent within the same category.
If images are cropped badly, read Image Cropping / Fit.
After editing, click Update or Publish in the upper-right corner. If you edit but do not save, the frontend will not change.
6. Check Frontend
After saving the product, open the frontend /products page and check:
- The product appears under the correct category.
- The product detail page opens.
- Product images are clear.
- Titles and descriptions have no obvious mistakes.
If product detail pages show 404, the product module usually has the wrong Detail Page setting. Read Product Module.
If products do not show on the frontend, check these 3 things:
- Is the product published or enabled?
- Did you select a product category?
- Is the product module detail page set to
/products?
First Product Batch Standard
The first batch is enough when:
- Each main category has at least 2 products.
- Each product has a name, category, image, and short description.
- Products appear in the frontend list.
- Product detail pages open.
- No
Untitled Product,test, or test product appears on the frontend.
Next
Add Posts - after products are ready, add 3 basic posts to make the site feel complete.